Splitboard buyers Guide… a few tips about what works and what doesn’t?
Splitboarding kit…what works, what doesn’t and what do you need?
Splitboarding is getting very popular these days and more and more Backcountry enthusiasts are now looking to make the commitment to buying their own kit.
Actual Splitboard board performance is an often overlooked area for those buying a new Split as there’s not a lot of info out there on what works and what doesn’t and there are now so many brands joining the Splitboard market that the choice for those buying or thinking of buying a Splitboard is full of pitfalls.
Many Splitboards are as the name suggests, just a board cut in half and many brands are simply jumping on the bandwagon and making cheap boards cut in half and enhanced with cool graphics and fancy names.

Splitbboards need different core structures to normal boards, here you can see the use of carbon both as a top sheet and internal stringers for extra strength.
Buying a Splitboard.
When buying a Split it is important to first understand the performance demands and capabilities of a Splitboard. You must understand how a Splitboard works and what makes it perform or not perform as the case maybe.
It’s no good to just buy a brand that you like or a Split version of your regular board as a regular board simply cut in half won’t have the performance Characteristics to work as a Split.
Even some of the so called leading Splitboard brands seem, to me anyway, to be simply missing the point and just taking their most popular normal boards and cutting them in half down the middle.
The ‘fast and light’ and ‘quick to change mode’ revolution also seems to be taking precedent in a lot of cases and can get in the way of good performance characteristics and whilst ‘light’ might be good on the way up, unless its been designed and re-enforced specifically for the ride down your descent, the main event, will suffer!
For me there’s nothing worse than hiking to a dream line only to be disappointed in the ride down due to the performance of my board.
When I first started Splitboarding seriously, about 10 years ago, I was often caught in a dilemma as to whether to take the Split for ease of ascent or to simply revert back to Snowshoes, do the hard carry and get the goods on the ride down. In most cases the hard carry won over a bad descent on an ill performing split.
Today, Splitboard design has obviously changed quite a lot, but…It is also important to note, that the way in which a Splitboard clipss back together has changed very little.
The hole patterns that were used for the clip attachments ten years ago have become standard on all Splitboards that are manufactured today.
Anyone with any understanding of how a board works, how it flexes and the dynamics of pressure through the edge during a turn should be able to see the flaws in having firstly, a board with a Split down the middle, and secondly, having the fixings that keep the board together and stop it folding along the split, only 3cm either side of the Split.
Whilst some of the boards rigidity is produced through the fixings of the binding, the majority of pressure towards the end of the turn (the most important part of the turn in terms of control and direction change) is focused in the rear portion of the board way behind this part of the board, (ie) the part of the board that is not re-enforced by the binding but by the clip and even further back towards the tail of the board held together by a plastic clip.
If you imagine that you can push 6 times your body weight through the edge of the board at the end of carve, then you don’t need a degree in physics to see understand that the fixings 3cm either side of the Split are not going to prevent the board from flexing or folding along the length of the Split in what I have termed as ‘V’ying.

the dreaded ‘V’ing that reduces the angle of heel edge and causes skidding out.
“V’ying is how the board flexes or folds as 2 separate halves from the central split. If you take a Splitboard and hold the rear portion of the board by its opposing edges and flex the edges upwards, the base will flex so that it is no longer flat but ‘V’shaped.
If the board is on its edge, the ‘V’ effect massively reduces the amount of edge tilt during the most dynamic part of the turn giving the feeling of edge release and skidding as the side of the board under pressure is allowed to flatten due to the location of the central fixings. This loss of edge massively affects and reduces how much pressure you can put through the edge and how much you can bend the board to finish off the turn.
Maybe I’m not making this clear, or maybe its obvious and needs no more explanation but basically, when a board is on its edge, the pressure through the edge tries to flatten the board to the snow. The torsional flex of a normal board is structured in the core, so as to stop this happening but with a splitboard there is an obvious weakness down the middle of the board as shown in the photo above.
To stop this happening, a Splitboard needs to be designed as 2 halves that are individually structured and strengthened rather than being simply a normal board cut into 2.
Obviously in deep powder were all the base of the board is working ‘V’ying isn’t a problem and for the most part in good snow you won’t notice a difference in performance from a normal board.
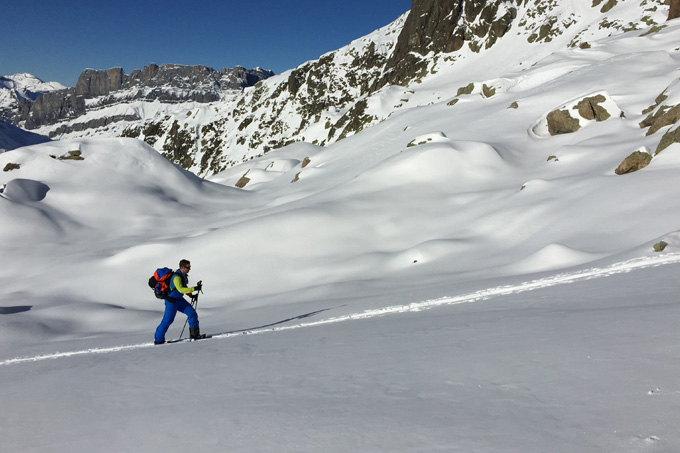
Here in the Alps, it is common to ride a full range of snow conditions in every run as the Vertical drop on a big descent, 4000m to 1000m, can take you through vast temperature changes and you might go from deep powder to refrozen crud and spring slop all in one single run.
Here in the Alps you definitely need a Splitboard that can handle everything and handle it well as very often these days it’ll be a Splitboard that is under your feet for that big extreme descent that you’re making far out in the range.
Anyway, what I’m trying to get across is the importance off performance and to hi-lite the importance of choosing a board that is actually designed as a performance Splitboard rather than one that is just too ‘fast and light’ or just simply a normal board cut in half with a Pro’s name or a fancy graphic emblazoned across the top.
Finally in terms of shape, its most probable that if you’re going Splitting you’re going to be Freeriding big mountain descents rather than jibbing and whilst you might want to hit some natural booters on the way down, you’re probabky not going to need a twin tip for any of this so get a Freeride shape under your feet and go a bit longer so that you have more stability with a bit more speed.
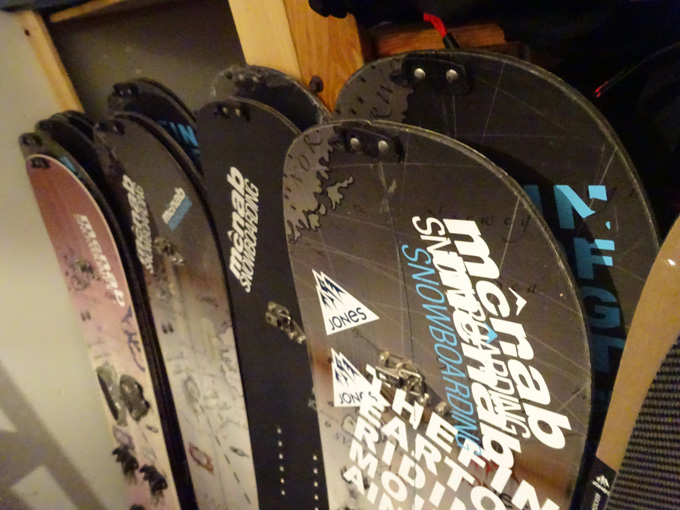
The best boards today, and this is something we’ve been working on with the Jones Boards, have carbon stringers or re-enforcements built into each individual half of the Split so that each half works independently of the other and has the strength to perform on its own in order to eliminate the ‘V’ying problem.

Jones Splitboard with the stiffening carbon stringers visible (the black lines running tip to tail in both halves of the board. The clip mounting holes need to change at some point though!
Carbon is a great product for strengthening Splitboards as it can give the power and performance we need with out adding to much weight.
Anyway, make sure you look at the structure of the Splitboard and see if it was designed as two halves working together or one whole cut in half. It’s worth paying that little extra for the first option!
Here are a couple of solutions that I find work and I use to combat the reduced stiffness across the tail of the board.

the power bar, which runs across the middle of the board using the touring mounts…duck tape essential.

the celebrated McNab anti V power plate which stiffens the rear of the board making it ride like a solid, the butterfly bolts are easy to use in the cold with gloves on
Fast and Light?
The fast and light approach is all the rage these days and for sure the weight of your kit is an issue going up hill. But remember, you walked all that way for the ride down so don’t compromise performance for weight saving unless your kit has been designed and re-enforced with this in mind!
With regards the change over, changing mode is pretty quick and easy no matter which set up you have, you just need to get used to the system you use and make sure you have everything sorted and dialled in, speed of change won’t be a problem once you have your change over routine sorted.
At the moment I’d go performance over lightweight…Lightweights day will come when the system for attaching the boards together stops using holes for the support attachment clips 3cm off the Split.
Splitboard Bindings.
Fortunately we’ve progressed from the days when we had to stick a normal set of bindings on a wobbly metal plate a cm or more above the deck, thus massively reducing performance of an already compromised ride.
Modern Splitboard bindings have come a fair way recently and get better every year but again, look at what you’re buying and why you’re buying it…Performance!
Splitboard bindings are also an area which needs some attention.
Again, some Splitboard binding producers are so involved with trying to make things light and easy to switch that they very often neglect the performance issue and support of the binding.
All Splitboard bindings so far are made from metal components. In the real World of Snowboarding there aren’t many riders still riding Metal bindings, mainly due to the fact that they are uncomfortable and don’t have the performance and flex characteristics of a modern moulded binding.
As Splitboard bindings are a new concept and still under development, working with metal components allows those producing them to be able to play around and change things easily year by year. Most modern-day Splitboard binding companies started out as a couple of mates building bindings in their garages and it developed from there. The Splitboard revolution has progressed so fast that in many cases these new companies have been struggling to cope with growth rather than having time to work on development and production methods.
Eventually when things have settled down we should get a good high performance moulded binding coming through that ticks all the boxes.
For the moment however we have to ride with what we have and like I said, they’re getting better and better for sure but make sure that you play around with your bindings when you get them, set them up just right for your boots and look at how they sit on your board. try to make sure there’s no heel overhang, which is quite common unless you drop the heel cup forwards on the binding base, heel overhang makes riding your Split hard work on the heel edge, toe overhang you can deal with…in moderation obviously!
I might quickly add here, that if you get heel or toe overhang, get a wider board! There is a myth that a wider board is harder or slower edge to edge, which is wrong, the width of your board needs to match the size of your feet. If your feet are correctly positioned over the edge of your board heel and toe, then the performance will be relevant.
With a Splitboard binding, I find that it is important to have the option of extra forward lean as a compromise for the extra edge tilt you need to overcome if the board is ‘V’ying.
Be prepared to change the High backs for a stronger option with greater support and more forward lean if you feel like you need it.

customized Splitboard binding with a custom fit highback for extra foward lean support to combat the dreaded ‘V’
I’ve been customizing my bindings for for years and most of my regular Splitboard clients have done the same with great results. Sometimes it’s a bit of a competition to see who has come up with the best solution and we’re definitely making progress!
Also the base plate of the binding will probably not have the cushion and toe raisers common with modern bindings so be prepared to add your own.

Customized Splitboard binding with toe raiser and beefy straps.
Straps are also quite often brittle and cheap and compromised due to trying to keep the costs down of an already super expensive product.
Personally I use the Karakoram binding as I like the extra height in the heel cup, I find this holds your boot into the binding better and gives more heel side support. I add a toe raiser that I cut off an old regular binding and drop a new highback on there, although the new Carbon highjacks that Karakoram are making now should do the job just as well…I’m still waiting for some to arrive! I also change the straps to the most comfortable and strongest I can find.
One last thing…Your bindings are held together with nuts and bolts, the flex properties of the bindings will mean that these nuts and bolts ‘will’ work loose. make sure that you check them regularly and take some spares with you on big adventures!
Until someone comes up with a moulded Splitboard binding with the performance characteristics of a normal binding, be prepared to customise your own set with new bits that suit your needs…it’ll make a big difference in terms of performance.
Splitboard Crampons
You’ll definitely need some Splitboard Crampons at some point if you’re splitting out here in the Alps. All the binding manufacturers have a compatible set for their bindings so make sure you get some. I try to never need them as they really slow things down and it’s sometimes easier to take off your board and hike if the snow is that firm anyway, so keep that in mind!
But, you should have some all the same, they can get you out of some tricky situations and I know some people that use them all the time.
Poles!
There are a lot of good new ‘Z’ style poles on the market now so Id recommend you get these rather than twist or lock poles which freeze and ice up. I use an alloy BD hill running style pole, I used carbon for a while but they’re a bit brittle in the cold.
Keep them in your pack when riding rather than on the outside so you don’t loose them or rip the pack in a fall.

A good selection of different Z style poles, some carbon, some alloy…the customized running ones on the left are my favorites.
Runners have been working on the fast and light approach for years and its definitely a sport that suits this. Running poles are a great option for Splitboarding but you might need to change the plastic baskets on the bottom for snow friendly ones. If they’re not easily changeable ones and are glued on you can normally heat them up and tap them off once the glue is warm and then slide and glue the ones of your choice on instead.
Black Diamond have some great adjustable alloy Z poles with interchangeable basket that are perfect for Splitboarding.
Skins!
Skins are important, most brands are good, I use G3 but most are ok. they’ll last a long time if you look after them. Try to use a plastic cheater skin for ease of use and to keep the glue in good condition.
Avoid using a Skin sock as the material puts fine fibres into the glue and reduces the life of the skin and sticking skins glue to glue means you’ll struggle to get them apart as there is so much surface area.

my skins with plastic cheaters. I like the clips on the G3’s
I use a Cheater skin cut in half for each skin and fold it over so that it is stuck to both sides of the plastic. This makes it easier to use in windy conditions.
And that is it…I think, so to conclude…
Ok, so, if you’re going to buy a Split set up, look for a board that has been designed as two halves specifically for the pressures of Splitting. Get the right width and normally you’ll be riding big mountain terrain so go a little longer than you might normally ride in a Freeride shape!
Get a good solid binding that works with your boots and supports you on the heel edge and be prepared to customise them to suit your needs.
The middle of nowhere is the last place you need some light weight component breaking in half so check things regularly and always carry a toolkit and spare parts on your trips.
Get poles that fit in your bag!
Look after your skins and use a plastic cheater skin for storage.